how to change computer language Hindi to English

यदि  आप आपने कंप्यूटर ( विंडोस सेवन ) की प्रदर्शन भाषा वापस  हिंदी से अंग्रेजी  में बदलना चाहते है तो अनुसरण करें


नियंत्रण  कक्ष  में


कुंजी पटल और भाषाएँ का चुनाव  करे


प्रदर्शन भाषा में अंग्रेजी  का चुनाव करे और संपन करे


आपके कंप्यूटर की प्रदर्शन भाषा वापस अंग्रेजी  हो गई है और यदि आपको सम्पूर्ण  रूप से अंग्रेजी  सक्रिय करना है तो  अनुसरण करे


नियंत्रण  कक्ष  में


आशा करते है की आपके कंप्यूटर की प्रदर्शन  भाषा एवं अन्य सभी पूर्ण रूप से अंग्रेजी   हो  गई होगी।

0 comments :

Post a Comment

How to install new language in windows 7


Installing new Language in Windows 7


We are almost addicted to use computers or laptops in English and it’s really difficult to operate it in a native language and is a fun too.
Some of may be using computer in other languages than English because they know how to install other languages into their Computers.

This article helps you in how to find your native language and how to customize & Install it into your computer.
How to modify your Welcome & Login Screen with your Native language or any other language you want.
You just need to follow step by step instructions. This article is design with keeping in mind that many of our readers are new learners of computer.

“If you really find fun in learning, exploring & sharing knowledge about computer than this blog is one of good place for you to fulfill your thrust”.

Before we start, just check some information about your system
Like your Operating System type: 32Bit or 64 Bit Operating System.
If you don’t know than just follow me…
Go to start menu-> Right click on Computer and properties.
At System You will find your Operating System type.


Language Package:

Go to the Below link for Downloading Language Package

Click Here!!(http://windows.microsoft.com/en-IN/windows/language-packs#lptabs=win7)

#Select your Language and Press Get it!!
#Press Download
#select your operating system type as 32-Bit or 64-Bit
#Press Download

As Download Completed Copy that file and place it at Desktop.
Here I am Using Hindi Language package 32-Bit.
Now we are ready to install it.

Step 1: Go to Start Menu-> Control Panel


Step 2: Find Region and Language Click on it.


Step 3: A pop-up menu appears then select Keyboard and Languages.


Step 4: In Display Language section Press Install/Uninstall Languages Button.
[ If your system has some more preinstalled languages other than English than it will be listed as Choose a display language.]

Step 5: Select Install display languages.


then


Selection 1: Use windows Updater to download & Install, May be start downloading all other files to or it can be a time taking process.

Selection 2: Browse Computer or Network for Downloaded Language Package.

Step 6: Browse Computer or Network.


#Select Desktop
#Select Language Package


#press Next.

Step 7: Select I accept license terms and Next .
#At Language Interface pack Readme file press Next.


Installation Start!!

Step 8: On Installation Complete press Next.


Step 9:On Select Display language


#Select language you want to be your Display language
Option 1: Select this only if you want your Welcome & Login screen also in the same language.
#press Change Display language

Step 10: System will ask you for restart.

#save your all unsaved other data
Now press Restart now.

After restart you find your system in new language.


Now Enjoy your computer in your language Exploring system is Fun. If you have any query or suggestion please feel free to write me….


0 comments :

Post a Comment

Hide & Unhide files & folders

You may have some questions in your mind like
How to hide files or folders?
How to unhide files or folders?
How to show hidden folders?
How to view hidden files?
How to permanently unhide files?
Then you are at right place…

Most of Desktop, Laptop & mobile phone users like to keep some private folder/files hidden so that other people can’t find it easily and some malicious people & programs also like the same.

Files & Folders are two most common words among computer users. In general we use at least 15-20 different kinds of files like .txt, .jpeg, .mpg,.mp3, .mov and many more.

Files and Folders in our system are mainly create in 3 ways:
1.By Operating System
2.By User
3.By some malicious program or virus.

Our operating system assign some properties (attributes) to every file or folder created by any of above mentioned ways.

That helps Operating system in managing & handling of files.

File properties (attributes) are:
1.Name of File
2.Type of file
3.Location of file
4.Size of file
5.Date of Creation & Modification
6.File Visibility (Hidden/Visible )
7.Creator information.
8.Read/Write permission

Now, from all above properties we are interested in hiding & un-hiding files only.
And it’s too simple to do that just follow few quick steps:
[You can hide any particular file or any folder that contain many files]
Step 1: Just select & right click on that folder/file.


Step2: go to properties.

Step 3: in general

#Check Hidden box for making File or folder Hidden.
If you are hiding a Folder than you may receive a confirmation message

Like:
Select 1: If you want to hid only that folder.
Select 2: If you want to hide folder and its containing files & folders too.

Sometime even after that your file may be visible to all the users because user system folder option is at show all folders.
Note: If your folder or file is not visible no need to follow next steps.

Step 4: Go to organize at right corner & select folder option.


Step 5: Select View in Folder option.


Step 6: Scroll down at Hidden files and folders.


Now Select option
1.Don’t Show hidden files, folders or Drive-OFF
2.Apply
3.Ok.

Now your file is completely hidden.
Feeling good!!
But main problem begins now,
When you try to find your folders or How to find hidden files or folders if they are not visible to you also?

#If you have hide a folder with select 1 at step 3 & you remember the folder/file name.
Means only outer folder is hidden not internal folders are than you can use this short cut to access your files.
Go to the folder directory means the place where you hide the file.
Now, go to address bar and just type folder name & press enter.
Wow!!
You got the file open!!
The reason behind that is you have only hide the external folder not the internals, But if you select 2 at step 3 you are not able to access files with that short cut.

# Use the search box to find that folder or its contents means internal file names you may able to access them.


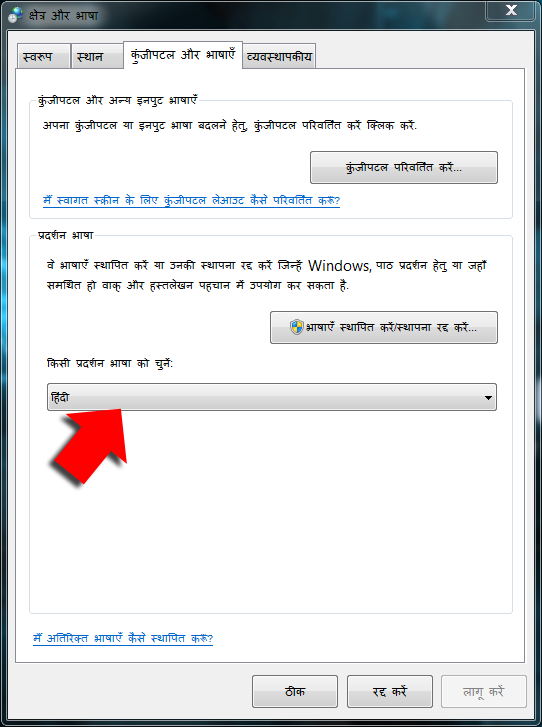
How to Unhide hidden files?


Step 1:Open my computer & Go to Organize.
Step 2:Select Folder Option and Go to View.

Step 3:At Hidden files and folders


Select 1. Show hidden files, folders, and drives-ON.
Note: Keep check always
Hide Protected Operating System files (Recommended)-ON
Select 2: Apply
Select 3: Ok.
Now your all hidden files become visible.

And for making file permanently visible:
#Right click on folder
#Go to Properties

#Uncheck Hidden
Now your file is permanently visible to all.

But in case if your files are still not visible that means your system is infected by some kind of virus or maybe you forget to apply & press Ok!! so check it back.
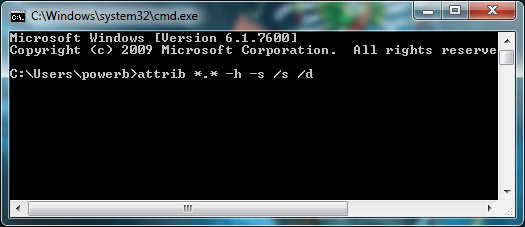
If they are still hidden you need to Use Command prompt to unhide them


Hope you find the solution for your problem and if you have any information or suggestion to add on it please inform me…..

0 comments :

Post a Comment

Unhide files & folders using command prompt

Command Prompt tricks.


Its quit handy to use command prompt for making folders & files visible…
#Don’t worry if you don’t know How to use Command prompt
You just need to follow the steps & type a single line code or you can use system interface also.

It may be possible that you have already tried system interface method means going to Organize then folder option & view.
than also its ok!!
Command prompt method has a high probability of success.

  
Step 1:Press “Window Button +R Key” to start Run.
Step 2: Type  cmd   only at text box and press Ok button.


Step 3: On Command Prompt you may find something like

C:\Users\powerb>

Just type: attrib –r –a –s –h *.*


Or
You can use : attrib *.* -h –s /s /d


Step 4:If you want to unhide the which is in D drive:
1.You need to change Command prompt directory
Just type:   d:  and press enter

2. You don’t need to change directory
Just type: attrib –r –s –h D:\ *.* /s /d


Note:
# you can change D with any other drive name, even with your pen drive too.
#sometime command prompt may ask you for Administrator permission so, you need to use command prompt with run as Administrator option.

In both the codes above we are removing the properties of files and folders (-ve sign)
*.*  : (filename.extention) indicates all files with all extentions in your current directory.
-r : Enabling files or folders for read, write & delete.
-a : Turn off archive flag
-s : System(or system attribute flag off) command files
-h : Hiding off
/s : Switch to set  attributes on subdirectories found within the specified path.
/d : Switch to change current drive in addition to changing current directory for a drive.


I think now you are able to access your hidden files………

0 comments :

Post a Comment

Blank Screen Problem & Lost Explorer.exe issues

Trick of Explorer.exe


You, Just Started your computer or laptop and system completed Booting process and even come to desktop, but you are not able to access anything else and your all files & folders on desktop are missing!!!
A blank screen & nothing!!

Many of us don’t know how to deal with that situation and go for restart!!
Even after so many times restarting the system they are not able to get access to their computer file.
And most common thought comes into mind is Window is corrupted!! & it needs a rebuilding!! 
And we did that instead of searching about the cause behind this??
I also come across such situation & after doing some sorts of research I found the cause behind that.
And the cause is Explorer.exe
Now you may think what is this? & why it is responsible for such things?

Explorer.exe is one of the most important file in windows based operating system computers and most lovely target for most of Virus too.
Actually User interface system of windows operating systems are handle by “Explorer.exe”. It provide facility like Desktop, Taskbar & file browser to access all other files of our computer, in other words we can say “Explorer.exe” is file Navigating & Guiding system for windows Operating System.

Explorer.exe file comes into existence after launching of Windows 95 operating system by Microsoft and continued in to all other versions of operating systems like Windows 2000, windows Xp, Windows 7 & Windows 8.
In windows 7 & windows 8 it is also called as File Explorer and also considered as Windows Shell.

Locating Explorer.exe :

You can locate Explorer.exe file in your system at:
C:\Windows

Directory or if ‘C’ drive is not your home directory than you can find it at your home directory means the Drive where your operating system is installed.


Checking Explorer.exe status :

Start your Task Manager with shortcut “Ctrl+Alt+Delete”.

Goto Processes.
You can locate explorer.exe as a running process.
Task Manager keep a record of all running Processes, user & Services.
And also have a control over Creation and Termination of any process.

So, if you find Blank Screen that means your “Explorer.exe” is not working it may be due to some virus infection or software problem.

Now how to handle the blank screen problem??
Just follow the steps:
When you found Blank Screen or you have done something more funny like 

i ended explorer.exe how to get it back,

i accidentally deleted explorer.exe,

my explorer.exe is missing,

deleted explorer.exe process...

For all above problem you can use it!!

Step 1: Start your Task Manager (Ctrl+Alt+Delete).
Yes, even your Explorer.exe is not working but Task Manager still working & keeping the records.

Step 2: Go to Applications.

Step 3: New Task & then Browse.


Step 4: Locate your Explorer.exe position & open it.


Step 5: Now you can access your Computer as Usual.

It may be possible that you lost your Explorer.exe than have a look at
(my Next Post)

Want to experience the situation?

How to recover lost Explorer.exe?

How to recover Task Manager?

Note: In case if your Task Manager is also infected than you can use Command mode to start your Explorer.exe.


Hope my guidelines will help you to fix your problem & your system too.
If you have any suggestion or problem I really love to hear it!!

0 comments :

Post a Comment

Best Free Online Space Sites

Grab your Space over cloud for free!!


Storage that you can access from anywhere at any time…
Share your files, Folder & your computer with friends…
Create, Restore & keep your system Backup files…
Edit, Modify & update files online. . .
Connect Desktop, Laptop, Mobile phones & your other devices…
Free Applications for Windows, Mac, Linux, Android, iOS & more…
Experience the new cutting edge technology absolutely for free!!

Don’t Miss the opportunity!!
Sign up for free & Get your own Cloud for free…

We have Floppy, CD-DVD, Pen Drive & External Hard Disk but still we forget  data File at Home or Office.
We don’t want to upload files & wait for it, every time we mail it to our friends or Employee.
Then it’s more better to upload file ones at cloud and just share the link with all no need to upload every time.

If you are a blog writer or owner of a little business company than you must need a place to keep your all data safe & secure for just Free!!
And a place that create a link for sharing that files or Documents with your Employee, Friends, Family or Customers.

Now, you may think that it must requires to Pay!!
And the answer is Yes!!, But as Usual we are not interested in paid one because we want everything for FREE!!
And I have a long list of such place where you can find even 100GB Space over cloud for Free!!
You just need to sign up with a little fill up form and space will be yours!!
You can also Use My offer links to sign up & get Some more extra Space For Free!!


Free Cloud Space List:


   1.GoogleDrive


Free Space: 15 GB
Most simple way to get 15GB free space is just create an account at Google & you will get 15 GB instantly!!
Many of us even have Google account but don’t know about that facility provided by Google as Google Drive.
Apps : For Windows ,Androids & More.
Remark : Most trusted.
  
Free Space: 15 GB
If you have account on Microsoft website like live.com or hotmail.com than you can directly login with that otherwise you need to create a free account.
With that account+ 15 GB space you also Get Microsoft Office inbuilt at your account, that means you can create or update any document at your account.
Apps: Windows, Android & More.

Offer Link :
Login With offer link & Get  0.5 GB Free Extra.  Limited Offer!! (Total 15+0.5GB)


Remark : Most Trusted, you can also get more space if you connect your camera and other devices.

  3.SurDoc


Free Space: 100 GB.
App : Available.  
If you need a 1TB Free Cloud Space then SurDoc is the best place to Get It.
Provide 100 GB Free Space On Free Account And Rest of 900GB you can earn by inviting your friends and  sharing posts about SurDoc on your Social Site Like Facebook, Twitter or Google+, 10 GB Free space on your account for each post & Friend join to SurDoc.
Even though they Gift you 10GB Free Space on File Sharing.
Best Chance to get 1TB Cloud Space Absolutely For Free!!
You Can also Download (export) your uploaded data files as pdf files.

   4.ADrive


Free Space:50 GB + 60 Day Free Personal Premium Trail.
Apps: Android / ios apps & apps For Windows/Mac.
You can Edit your Files online also.
You Can Set Expiration date For Shared Files and Password Protected Sharing of File.You can transfer files from Remote address to Directly your ADrive account.

Provide Data Recovery Services also Like:

  • Hard Disk Recovery
  • SSD/Flash Drive Data Recovery
  • Tape Drive Recovery
  • Server Data Recovery
  • RAID Data Recovery
  • Mobile Device Data Recovery
  • NAS & SAN Data Recovery
  • Desktop & Laptop Data Recovery
  • Remote & On-Site Emergency Recovery.

Free space: 10GB.

Free link : Click Here!!

   6.yandex


Free Space: 10GB.
A lots of Extra Features Like Photo Editing and Many
more!!
Apps : For Windows, Android and More.


  •   You Can import Your Photos from Social Network and Keep them here safe & secure also edit them to repost them.
  • You can Connect your Camera to your account for direct uploading of Images.
  • Don’t Miss the Chance to Get 1 GB extra space.
  • Take a Screen short Using Yandex Screen Short and Get Direct link for that.

Offer Link:
Get 1GB Extra Space means 10 GB +1 GB
Sign Up Link: Click Here!!

   7.Dropbox


Free Space: 2 GB.
App: For Windows , Android & More.
You can activate/synchronize two different Pc with one User account. Earn some more free space & Extend your free account maximum up to 16GB for free.

Offer Link:


   8.IDrive


Free Space: 5 GB+ 5 GB Sync Space Free.
App : For Windows, Android and More.

  •  Mobile Backup
  •  Online Synchronization
  •  You Can Create Backup of all your Facebook & Instagram Data.
  •  Automatic Real Time Backup.


Encryption Key System :
If you want to share files than go for default encryption Key Provided by IDrive.

  9.idrivesync


Free Space: 5 GB.
App : Available.
They provide 25 GB of Free storage to all students!! If they Create an account with a valid school email address and only need to verify.
Invite Friends & Get Extra Space.

10. symform
Free Space: 10GB.
App: Available For Windows / Macintosh /Linux and Mobile Devices.
You Can Get 1GB Free Space over Cloud by Contributing your Unused Space on Hard Drive.

    11.Degoo


Free Space: 100GB.
Free Backup your system Instantly!!
You can keep 100GB Data and Restore any where any Time!!
App: Available for Windows & Mac.

Get Bonus Space Login Here:

   12.bitcasa


Free Space:25GB.
Interface is Little Complicated For Normal User.
Special for Developers who like to work on iOS7 (Available), Android (Available), Python (Coming Soon), PHP (Coming Soon) and HTML5 (Coming Soon) in build SDK Environment.

   13.4share


Free Space: 15 GB.
Easy handling & share with good user interface.
Apps : Available for Desktop , Cell phone , Android , Symbian, and BlackBerry And also a different Apps for Photo & Music Share.

Free Download : 4share Desktop App.

Offer Link:

   14.pCloud

Free Space: 20 GB.
App: For Windows, Linux and Mac.
You Can Increase it to 20 GB.
Use that Link and Get 1 GB extra Space:

    15.Pydio


Apps: Available for Android and iOS.
Open Source file sharing Solution, No need to Create Account one Can download publically shared file by a Pydio User.
It Converts any server into a file sharing platform.

    16.Box


Provide 10 GB Free For Personal Use and apps are also available.

    17.ccloud


Get 10GB For 90 Days.
Apps: Available.
Offer Time 100 GB For 90 Days Free!!


Above mentioned sites also provide some links after account creation that you can use to earn some more extra space by sharing the link with your friends or on Social Media.


Note:
Some website allows you to encrypt your all uploaded data with a key, to protect your data.
They ask you to select any one way of encryption at the time of account creation either default Key or personal key.
If you select Default key you can share your data as public too. But if you go for personal key you will be not able to share your files as public because to decode your files they must need your Key.
So prefer Default key if you want to Use your account for Documents & File sharing.

Don't Forget to Read Company's Terms & Conditions Before Use to keep yourself & your Data safe. 

Hope you Guys find my blog useful for uploading your files, Folders & other stuffs on cloud and If you have some free links than you can share them with others as comment too.

0 comments :

Post a Comment